This example shows how use custom shaders in gz-rendering to change the appearance of objects in the scene. It demonstrates two uses of shaders: The first is setting shaders for a camera and the other is setting shaders for an object in the scene.
Compile and run the example
Clone the source code, create a build directory and use cmake and make to compile the code:
You'll see:
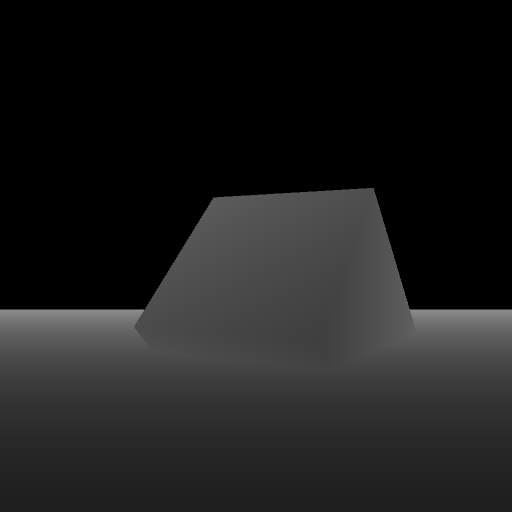
The depth.png shows result of setting shaders for a camera: This example shades objects in the scene based on their depth values
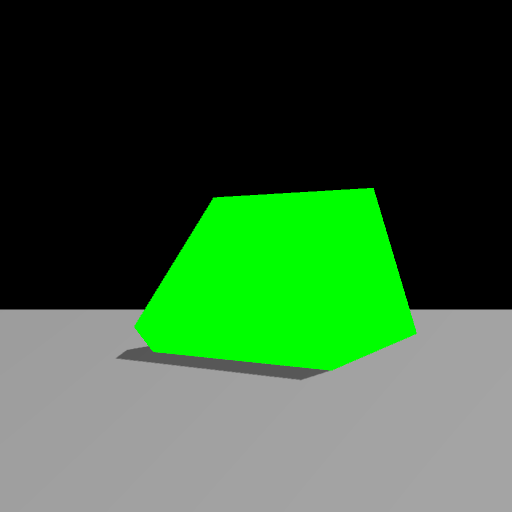
The regular.png shows result of setting shaders for a visual: This example changes the box visual in the scene to a flat green color
Code
In the first lines of the custom_shaders.cc file there are some constants defined with the name of the shaders that the program will use:
Construct absolute path to the shaders. Here the RESOURCE_PATH variable points to the media directory where the two sets of shaders are located:
The first set of shaders are applied to the camera:
The second set of shaders are applied to the visual's material: