Next Tutorial: Config Previous Tutorial: Command Line
About Plugins
A Gazebo GUI plugin is a shared library that defines a widget.
The plugin contains QML code that specifies what the widget looks like, as well as C++ code that defines the plugin's behavior and ties it to other libraries.
Starting a pre-built plugin (example)
Step 1: Running the Publisher Plugin
- Run the following command to run the Publisher plugin. A
gz-guiwindow would pop-up.
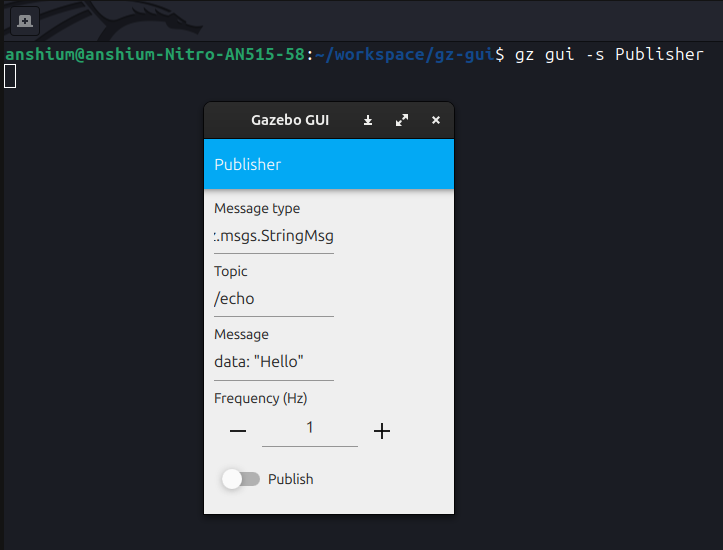
- Toggle the Publish button.
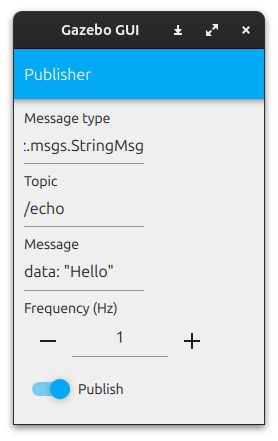
This makes the Publisher plugin to publish the message data: "Hello" on the topic /echo.
Step 2: Printing the published messages
Here the topic command of gz binary is used. In that, we want to echo (-e) the data published on the topic (-t) called /echo.
Writing Plugins
Working through an example
We will walk through the HelloPlugin to see how the Plugin is implemented.
We refer to the files HelloPlugin.hh and HelloPlugin.cc in examples/plugin/hello_plugin/ in gz-gui.
A new plugin should inherit from gz::gui::Plugin class.
The macro Q_OBJECT from the Qt framework must be included. This is because the class is a Qt class and it uses Qt features.
We then have the Constructor and the Destructor for HelloPlugin().
Implementation of the constructor and the destructor.
The constructor simply calls the base class constructor:
The destructor is empty because no cleanup is required as such.
The Configuration File
A plugin may require certain configuration files to specify certain parameter values.
In this case, we would want the configuration file to hold the message to be printed on the display (here the display is the terminal) when the Hello, Plugin! button is clicked.
Thus, the HelloPlugin.config looks like this:
The LoadConfig function tries to get the message from the message tag.
We have the OnButton() function which would print the message when clicked.
Thereafter, GZ_ADD_PLUGIN registers the plugin with the Gazebo GUI system, making it discoverable at runtime.
Refer to the documentation.
Configuring plugins
As shown above, Gazebo GUI supports loading XML configuration files, which may contain parameters to be passed directly to the plugin. See the Config tutorial for more information.
Finding plugins
Gazebo GUI will look for plugins on the following paths, in this order:
- All paths set on the
GZ_GUI_PLUGIN_PATHenvironment variable - All paths added by calling
gz::gui::App()->AddPluginPath("<<<custom_path>>>");. HereApp()is the pointer to running application in thegz::guinamespace. ~/.gz/gui/plugins- Plugins which are installed with Gazebo GUI
Setting up the environment for custom plugins
To run your custom plugin, follow the steps below:
- Navigate to the directory where your custom plugin is built.
- Set
GZ_GUI_PLUGIN_PATHenvironment variable as follows:export GZ_GUI_PLUGIN_PATH=$(pwd)
To check if GZ_GUI_PLUGIN_PATH was correctly set, do
More Built-in plugins
Image Display
Display images from a Gazebo Transport topic.
or
World stats and control
- Stats: Display sim / real time published on a topic
- Control: Buttons to make play / pause / step service requests
Topic echo
Echo messages from a Gazebo Transport topic.
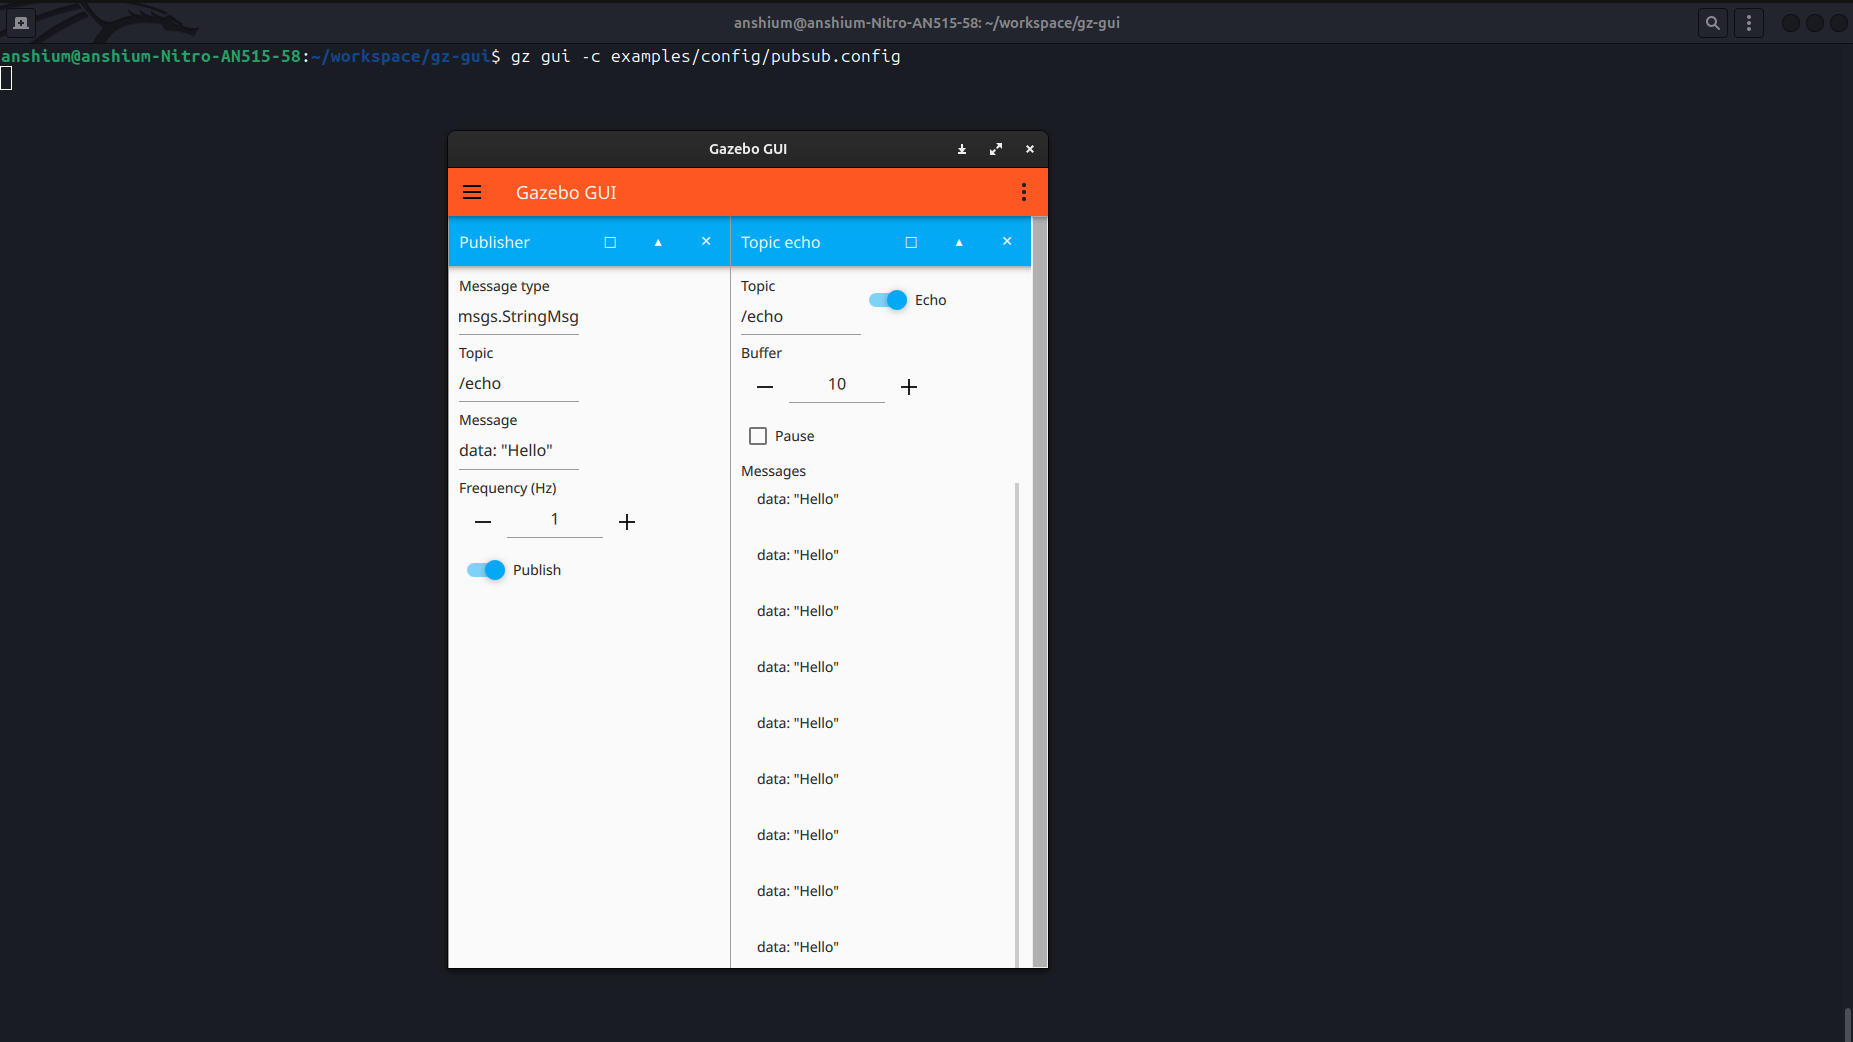
In the above image, the Publisher publishes data: "Hello" to the topic /echo.
The Topic Echo plugin (right) is used to echo the messages. Here it is echoing the messages published on the topic /echo.
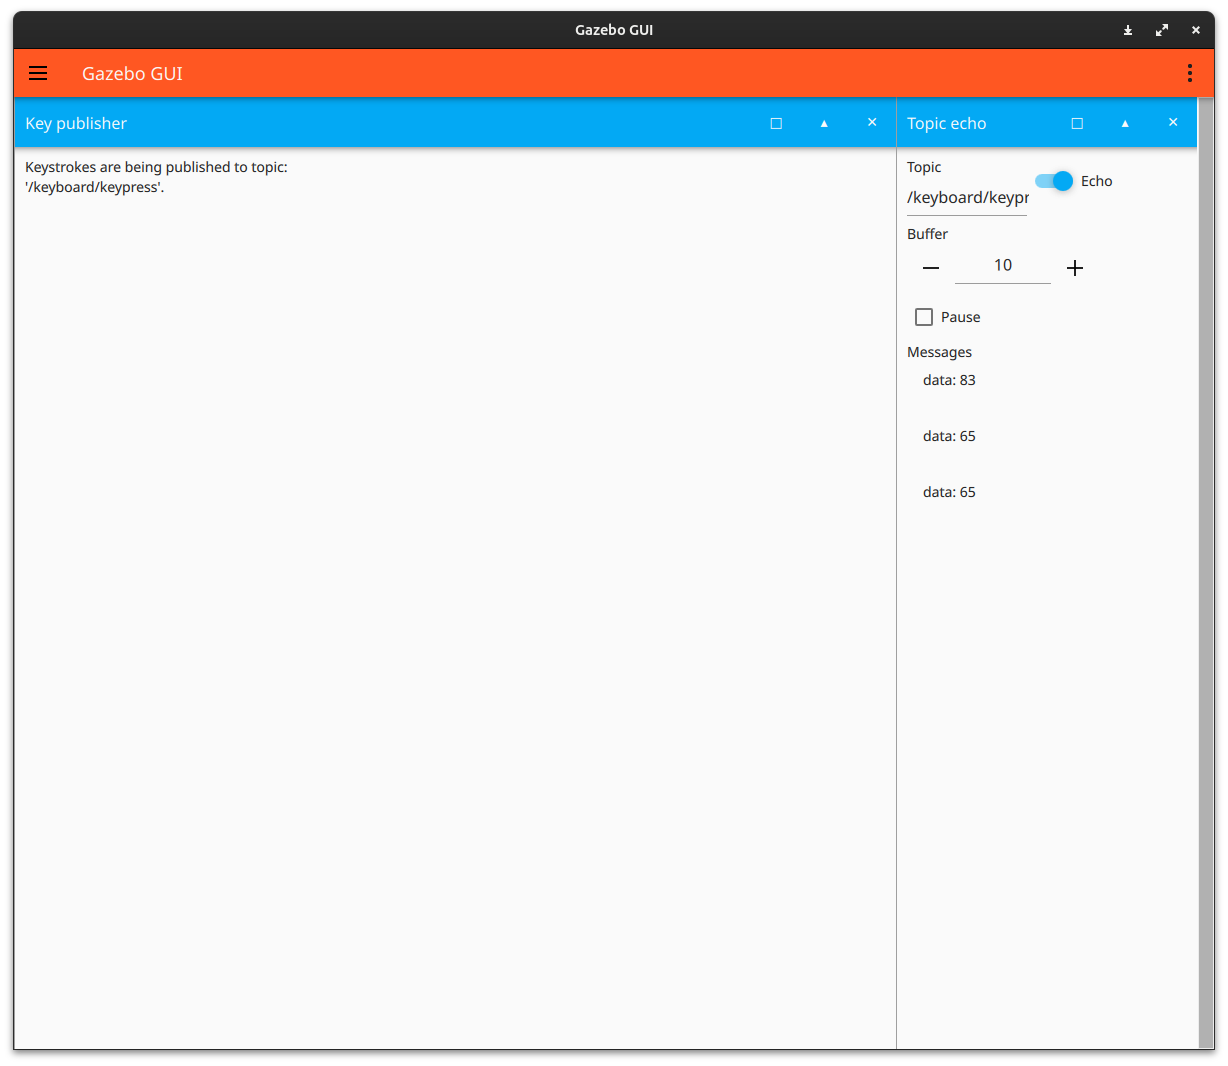
Key publisher
Publish key presses through Gazebo Transport.
Change the topic to echo to /keyboard/keypress, echo, and start pressing keys.
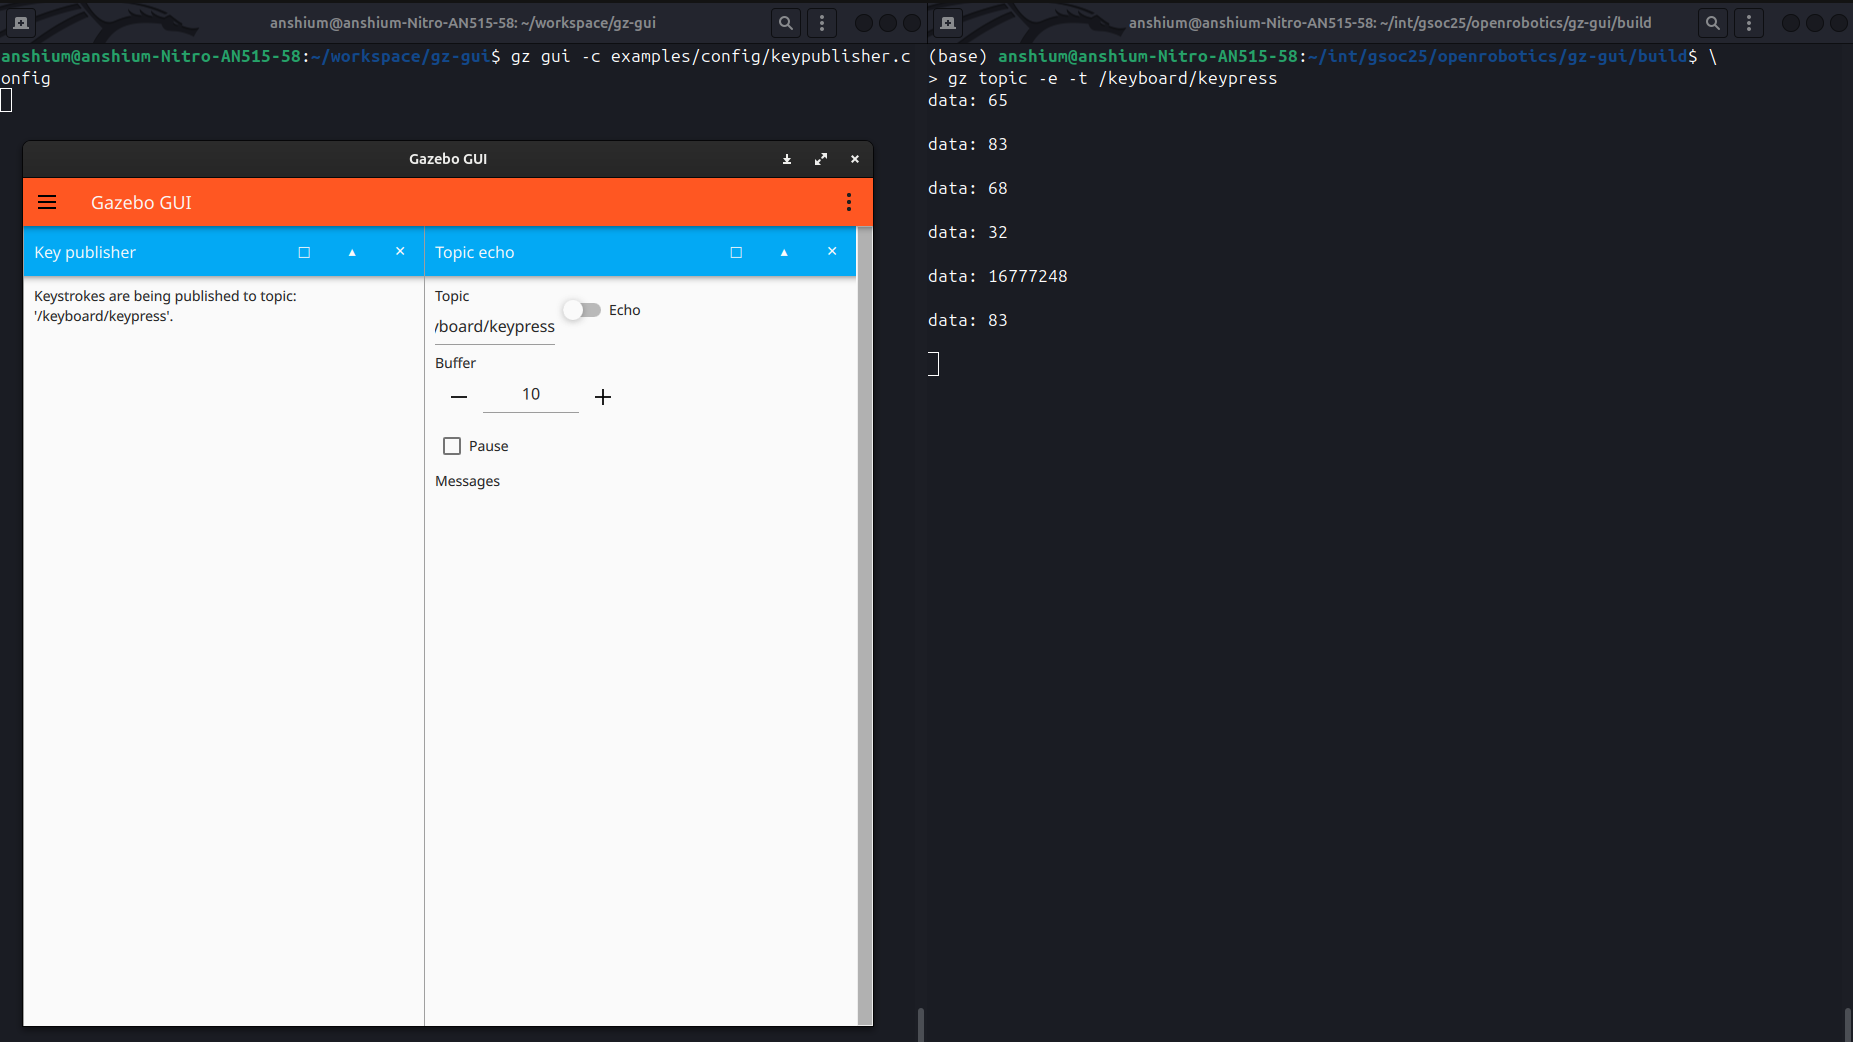
In the above image, the keys A, S, D, Space, Shift, S were pressed in order. The keycode values are printed on the right terminal.
Additionally, the keycodes can also be viewed on the Topic Echo plugin as can be seen below under Messages: