This example shows how to bake light maps in Blender and apply the light map texture in Gazebo.
Light maps
What is baked lighting?
- Baked lighting is pre-calculated/rendered lighting information from realtime lighting. These bakes are often called light maps.
Why are light maps useful?
- Light maps allow you to add global illumination, shadows, and ambient lighting at a relatively low computational cost.
Baking Light maps in Blender
In Blender you can bake light map information fast and efficiently with its built in renderers. For this workflow we will be using cycles renderer.
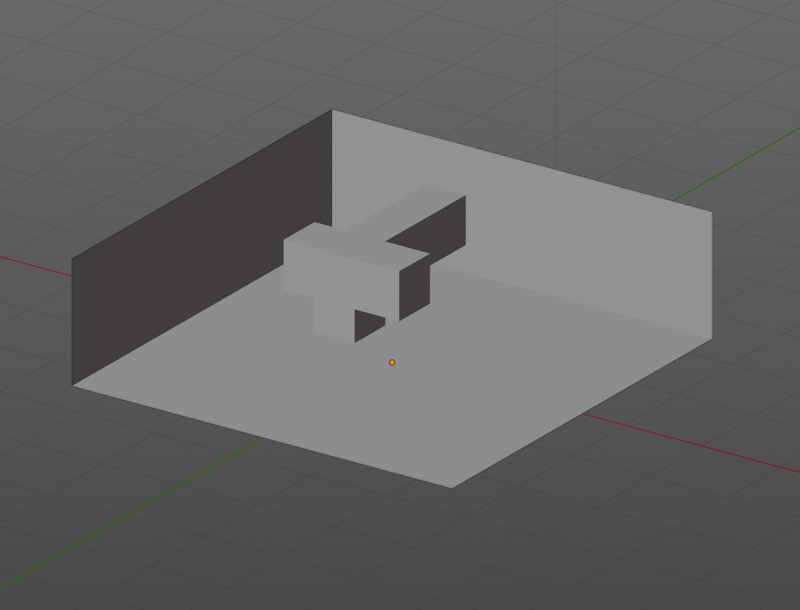
Step 1: Create or import model for your scene
To import a model go to file > import > (choose file type of model)
Step 2: UV Mapping
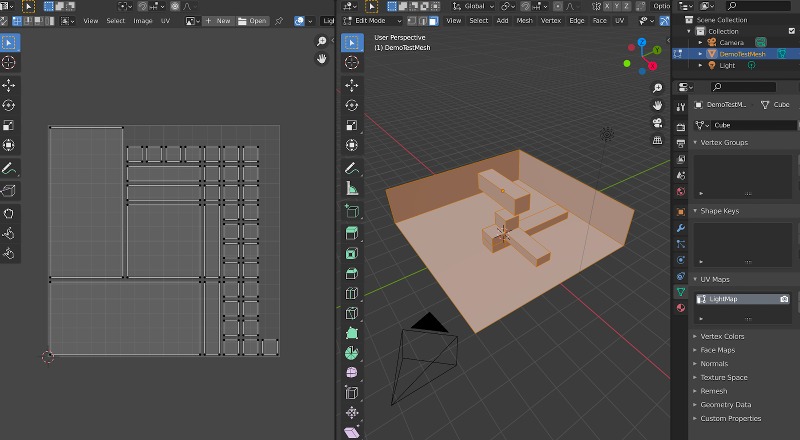
The next step is to create UV unwraps for your model. In Blender usually the first UVmap for any mesh created is for PBR textures and the second UV channel is for light map information. This secondary UV set is different from the UVs used to map things like color maps or normal maps because each polygon surface is receiving different lighting from all other polygons so each UV coordinate also needs to be unique.
For a fast automatic light map unwrap hit F3 and then search for “Lightmap pack”. Make sure to the “margin” is set to 1 for max distance between faces (reduces shadow bleeding during bake)
Step 3: Creating texture for model
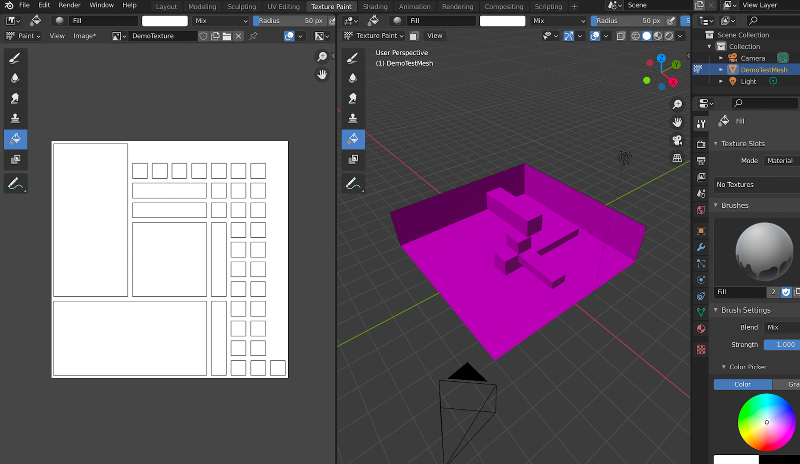
With the model selected in “Object Mode” select the “Texture Paint” tab at the top of the tool bar and create a “new texture” for the model (make sure the Alpha is checked off).
This new texture should be applied to the Light Map specific UV island that was created in step 2
If the texture is black use the color picker and select the UV island and it should turn white (easier to see the baked shadows).
Step 4: Material setup / Baking
In order to have the texture show the baked lighting we must assign it to a new material. With your model selected open the Shader tab and select Add > Image > Image texture. This will create a new image texture node.
- Add an image texture
- Connect the color from the image node to the base color of the material color (principled BSDF)
After this step add another image texture in the shader editor
- Give this one a new name (ex: MeshLightBake)
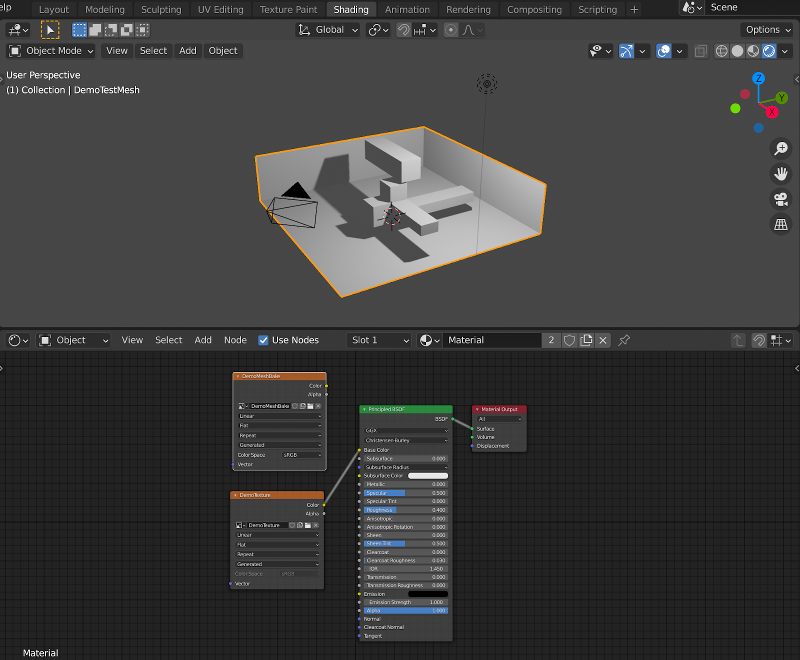
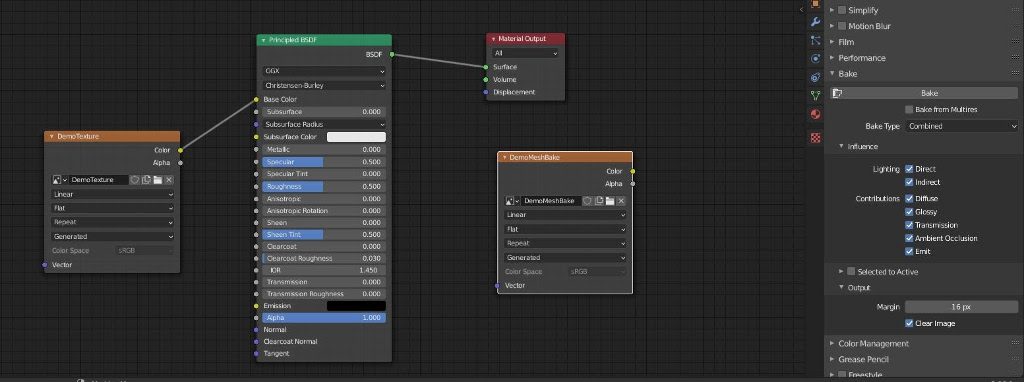
Now that the material node is set up, open the render properties and make sure that the cycles renderer active in the render engines drop down. Scroll down to where it says bake, and then with the second image node selected (MeshLightBake) hit bake. Blender should now start baking the light map for the model.
Step 5: Show Baked Lighting
After the bake is finished you should have a separate light map of your model.
- To see it applied real time in your scene, go back to the hypershade / materials editor. Click on the Image texture that has the baked light map information and connect it to the base color.
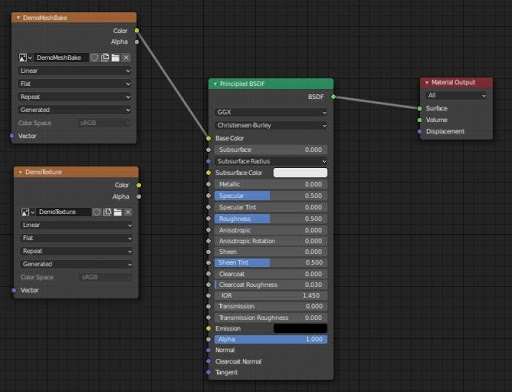
Model with baked in lighting (Blender Viewport Shading turned on):
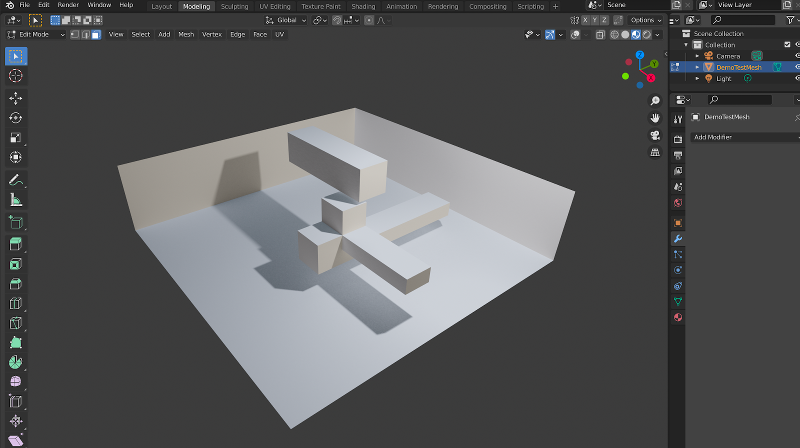
Step 6: Test/Export
Light maps are great for working with bigger scenes. With baked-in lighting, complex meshes can show realistic lighting without using heavy computation (the Depot model below is a good example of complex scene with a baked light map).
To export light map image go to UV editor > Image > Save as
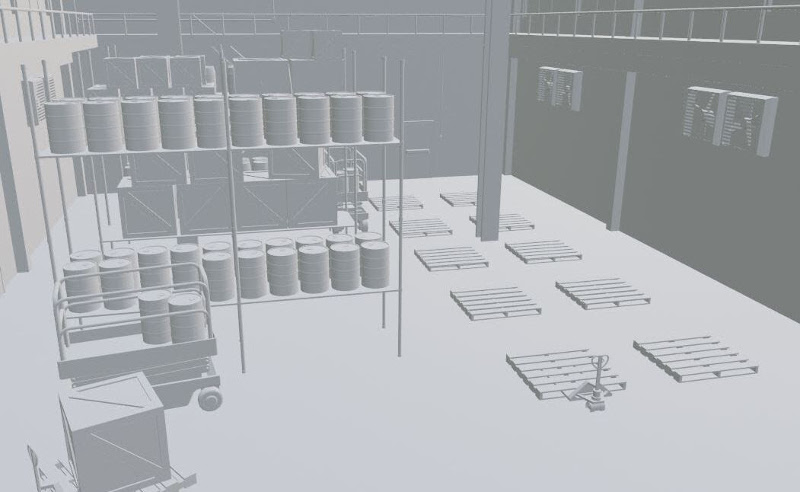
Light map baking applied to a more complex scene:
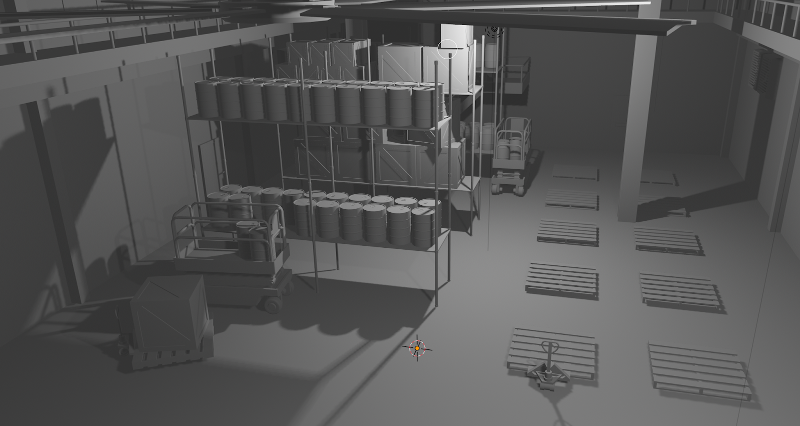
Using the light map in Gazebo
When baking we have the option to either bake in all the lighting, both indirect and direct, or just the indirect lighting, also known as global illumination or bounced lighting, and use real time lights in Gazebo for the direct lighting and shadows. With the latter method we get sharper lighting and shadow detail as well as more accurate lighting on our dynamic objects however performance will be impacted by having more real time lights. Even with all the lighting baked it’s still a good idea to have one real time light such as a large point light or directional light works particularly well in order to enhance the effects of the physically based materials.
Lightmaps can be applied to a mesh in Gazebo the same way as other texture maps. Create an gz::rendering::Material and specify a light map texture by calling SetLightMap. Recall that when creating the light map UV texture in Step 2, we typically use a secondary UV set for light maps. Make sure to specify the index of the light map UV set as the second argument to this function.
There are existing example models on Gazebo Fuel that use light maps. The Depot model mentioned earlier is one such example, and another one is the Indoor Lightmap model. To see the Indoor Lightmap model with Gazebo, you can run the following command (requires Gazebo Edifice or above):