Overview
This tutorial explains how to create and load a maritime surface vehicle in Gazebo. This type of vehicle usually has multiple thrusters and navigate with the presence of waves and wind.
Related tutorials
https://gazebosim.org/api/sim/8/create_vehicle.html
https://gazebosim.org/api/sim/8/adding_visuals.html
https://gazebosim.org/api/sim/8/frame_reference.html
https://gazebosim.org/api/sim/8/adding_system_plugins.html
https://gazebosim.org/api/sim/8/theory_hydrodynamics.html
Adding an environment
We'll start this tutorial creating a workspace with some custom models, worlds, and plugins that are not available yet on Gazebo. You could use this workspace as a template when in need of customizing Gazebo for your needs.
To compile all the custom libraries in the right order colcon is recommended. The colcon tool is available on all platforms using pip3.
Generic tools
Install tools needed by this tutorial:
Setup the workspace
Let's now build our workspace:
And run the simulation:

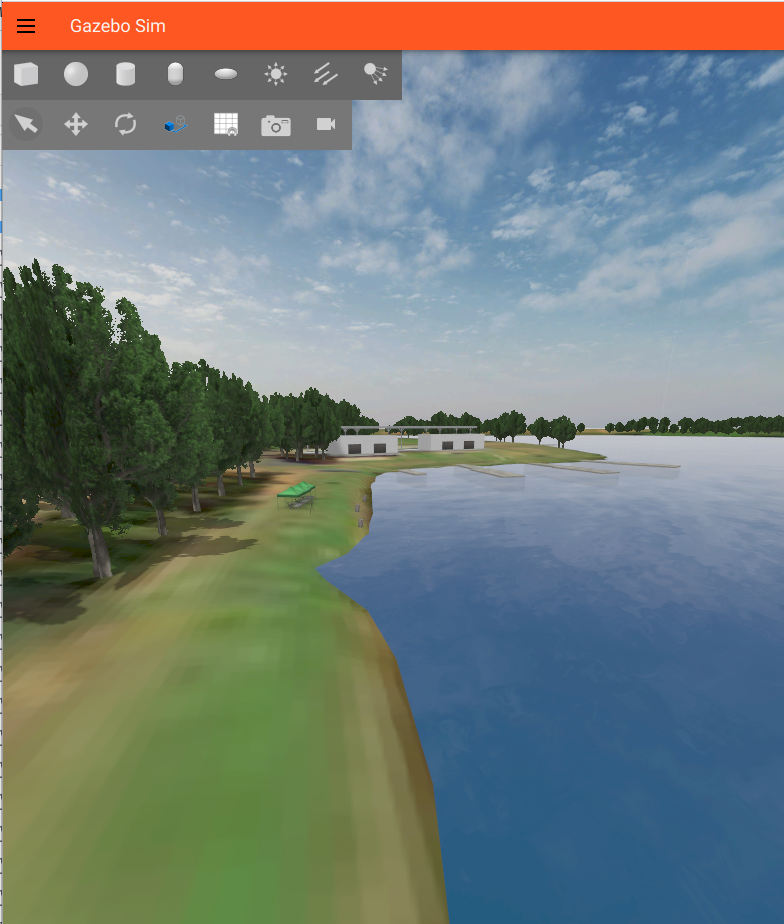
Gazebo is loaded with the Sydney Regatta Center!
Create your vehicle
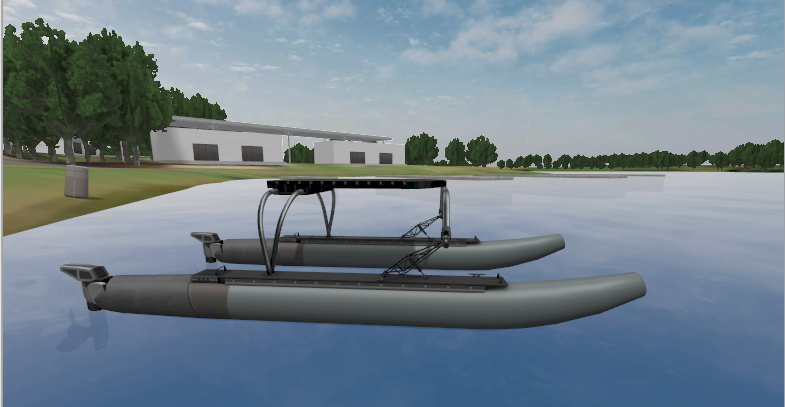
It's time to create our maritime surface vehicle. We're going to use the Wave Adaptive Modular Vehicle (WAM-V) as the surface platform. This is the robot that we use in the VRX project as well.
Basic SDF
Let's start with the basic SDF of the WAM-V platform. Open with your favorite editor the file ~/gazebo_maritime_ws/src/gazebo_maritime/models/wam-v/model.sdf.
Notice how the vehicle is composed by multiple links:
The main chassis with the two rigid pontoons are captured by base_link. A revolute joint (left_chasis_engine_joint) connects the chasis and the left_engine_link. The purpose of this connection is to allow the engine to rotate. This is an additional degree of freedom that we expose to make the thruster control more flexible. Then, the left_engine_link is connected to the left_propeller_link via the revolute joint left_engine_propeller_joint. The purpose of this connection is to allow the propeller to spin. This kinematic structure is repeated on the right side.
Uncomment now the following block in the sydney_regatta.sdf file:
And launch Gazebo:

If you hit play, your WAM-V will sink (sad but expected). There's no buoyancy enabled yet.
Checking frame of reference
Launch your world in Gazebo as we did before:
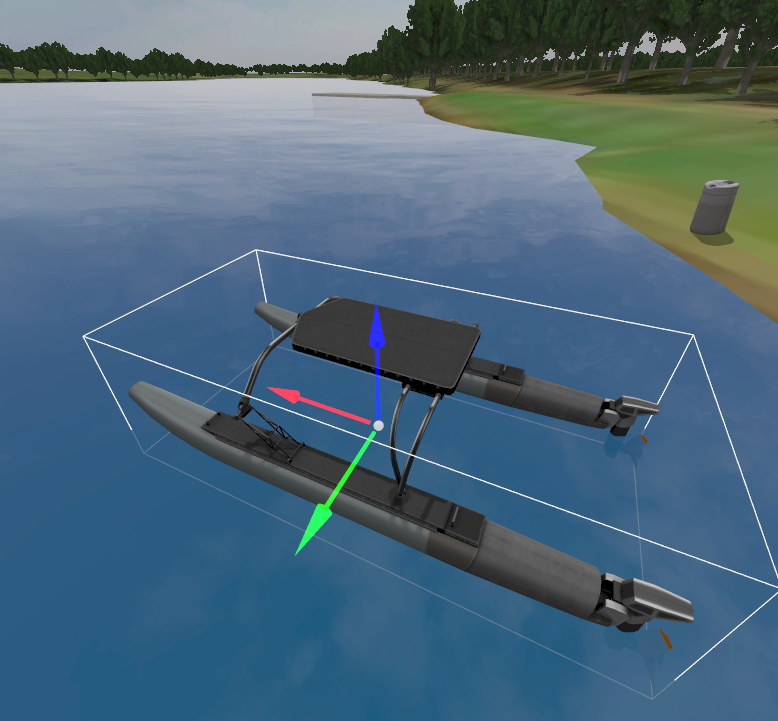
You can visualize the frame of reference of your vehicle by loading the plugin Transform Control from the GUI.

Then, click on the vehicle, and then, click on the Translate mode icon. You'll now visualize your WAM-V frame of reference. As this is the expected frame of reference, we won't need to apply changes in the COLLADA mesh or add any <pose> offset to our model.sdf.

Adding plugins
The Surface plugin
Normally, there's a section here where we explain how to add buoyancy to our model. It's totally possible to do it that way but for stability reasons, we have created a more specific plugin to simulate buoyancy in the presence of waves, the Surface plugin.
Open the file ~/gazebo_maritime_ws/src/gazebo_maritime/models/wam-v/model.sdf with your favorite editor and look at the Surface plugin:
Before we go into the weeds of the plugin, you can guess from the comment that this plugin simulates the buoyancy generated by the left pontoon. A very similar plugin is attached to the right pontoon.
The Surface plugin simulates the buoyancy of an object at the surface of a fluid. This system/plugin must be attached to a model and the system applies buoyancy to a collection of points around a given link.
This plugin models the vehicle's buoyancy assuming a single hull with a cylindrical shape. You can instantiate multiple plugins when your vehicle has multiple pontoons.
This plugin also supports waves. If you provide a wavefield topic via SDF, the plugin will receive the wavefield parameters and account for the delta Z that the waves generate at each point.
Here are the detailed parameters:
<link_name>is the name of the link used to apply forces.- [Optional]
<hull_length>is the length of the vessel [m]. - [Optional]
<hull_radius>is the radius of the vessel's hull [m]. - [Optional]
<fluid_level>is the depth at which the fluid should be in the vehicle - [Optional]
<fluid_density>is the density of the fluid. - [Optional]
<points>contains a collection of points where the forces generated by this plugin will be applied. See the format of each point next: - [Optional]
<points><point>Relative position of the point relative tolink_name. - [Optional]
<wavefield>: The wavefield parameters. See~/gazebo_maritime_ws/src/gazebo_maritime/src/Wavefield.hh.
Go ahead and uncomment the two blocks in ~/gazebo_maritime_ws/src/gazebo_maritime/models/wam-v/model.sdf to instantiate the Surface plugins and see the effect on your WAM-V:
Now your vehicle is floating in the water!
Hydrodynamics
I know, I know, it looks like a dancing catamaran. The reason for that behavior is because we don't have any drag yet to oppose the forces of the Surface plugins. We need hydrodynamics!
We will be using Fossen's equations which describe the motion of a craft through the water for this. For better understanding of the parameters here, I would refer you to his book (check your library). Usually these parameters can be found via fluid simulation programs or experimental tests in a water tub.
Uncomment the following block from ~/gazebo_maritime_ws/src/gazebo_maritime/models/wam-v/model.sdf to enable hydrodynamics.
And run Gazebo:
The WAM-V is much more stable now and see how it moves following the movement of the waves.
You could experiment with the wavefield parameters to see different behaviors of the WAM-V floating on the waves. For example, update the following block in the ~/gazebo_maritime_ws/src/gazebo_maritime/worlds/sydney_regatta.sdf world file:
The gain parameter has been increased to 0.8 producing bigger waves. You should expect your WAM-V to move more agresively up and down.
Both the WaveVisual plugin (used for rendering the waves) and the Surface plugin (used to simulate the physics of the waves) are updated via the same topic. The PublisherPlugin periodically publishes the wavefield parameters to make sure that all the wave-related plugins work with the same wavefield parameters.
Thruster
We need the vehicle to move, so we will be adding the Thruster plugin. In the case of the WAM-V, we need two thrusters. Each thruster plugin takes in a force and applies it along with calculating the desired rpm. Uncomment the following block from your ~/gazebo_maritime_ws/src/gazebo_maritime/models/wam-v/model.sdf model:
And start Gazebo again:
Send a command to rotate the left thruster:
Send a command to spin the right propeler:
And see how your WAM-V starts moving, bon voyage!