Using the video recorder plugin
Gazebo offers a video recorder tool for recording videos from the 3D scene. The recorder tool is available as a GUI plugin. To open this plugin, first launch Gazebo and select the ellipsis menu on top right (3 dots menu), and scroll down to find the Video Recorder option. Click on the plugin to open the Video Recorder tool. Alternatively, launch the demo world in Gazebo that already has this plugin included in the GUI.
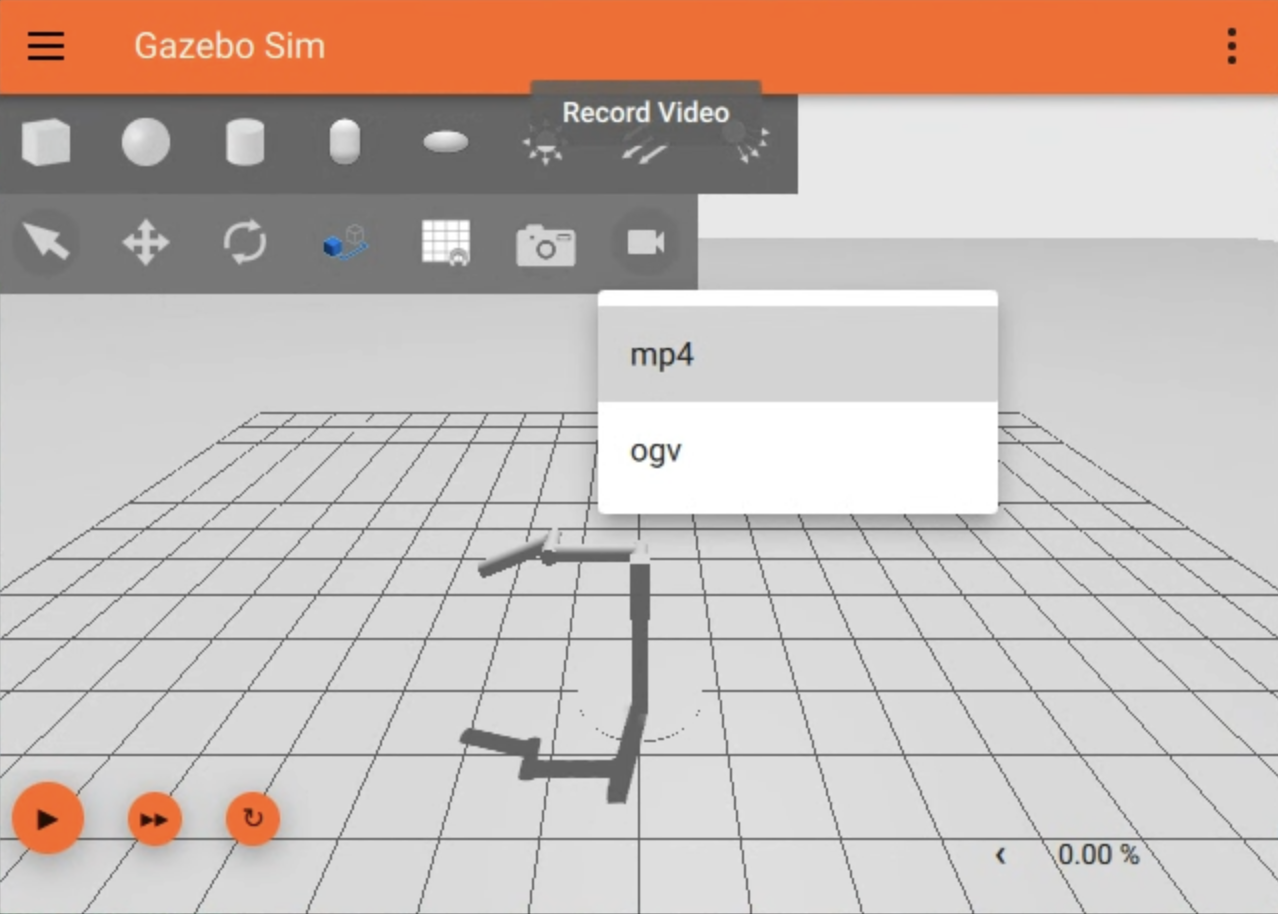
In this demo world, you should see a video recorder icon positioned on the top left area of the window along with other buttons. Clicking on the video recorder button gives you the video format options that are available.

NOTE The OGV format might not be supported by the underlying libavcodec implementation. This is especially true on Windows with the conda-installed dependencies. There is no easy way to add the VP8 codec support except for building libavcodec manually and enabling the support.
Once an option is selected, recording starts immediately as indicated by a flashing video recorder icon. At anytime that you wish to stop recording, click on the flashing icon and select Stop. A file dialog window should pop up and let you select the path to save the recorded video in.
Playback the video you just saved and you should notice that the resolution of the video is based on the size of your 3D scene window. So if you wish to record the video in a different size, make sure to configure the GUI window prior to recording.

Video recorder configurations
A few video recorder parameters can be specified using GUI configurations, see the GUI Configuration tutorial for more information. If you launched Gazebo with the video_record_dbl_pendulum.sdf demo world, the GUI configurations are embedded in the world SDF file so you will need to download a copy of the sdf file. and modify the GUI configuration in that file. On the other hand, if you launched Gazebo with a world file that does not have GUI configurations, you will need to specify the settings in $HOME/.gz/sim/<#>/gui.config.
Here is an example of the video recorder plugin's settings:
Options are:
- use_sim_time: Values are
[true|false]. Record videos based on sim time, i.e. each frame encoded into the video will be timestamped using sim time. For example, if a complex simulation was running at half of real time speed, and<use_sim_time>is set to true, video playback should ignore delays due to low Real Time Factor (RTF) and plays back video as if RTF was 1.0. By default, the value isfalse, which means the videos are recorded based on real time. - lockstep: Values are
[true|false]. Lockstep simulation for video recording. This forces the GUI to pause and only process a new state update from the server until the video recorder finishes encoding the current frame. This ensures that the video recorder does not miss any updates / frames in the resulting video. This configuration makes more sense when used with<use_sim_time>set totrue, in which case it produces smooth videos with exact timing, i.e. if you record simulation for 1 minute sim time, the resulting video should be also 1 minute long (+/- 1 second due to encoder settings). Defaults tofalse. Note: the server publishes states at 60Hz and the video recorder records at 25 FPS so it also makes sense to update the Scene Broadcaster system to only publish states at 25Hz. You can do this by going to the world SDF file, locate thegz::sim::systems::SceneBroadcastersystem, and set the<state_hertz>parameter:
- bitrate: Video encoding bitrate in bps. This affects the quality of the generated video. The default bitrate is 2Mbps.
Hardware-accelerated encoding
Since Gazebo Common 3.10.2, there is support for utilizing the power of GPUs to speed up the video encoding process. See the Hardware-accelerated Video Encoding tutorial for more details.