This tutorial will go over how to write Gazebo plugins that alter the 3D scene's visual appearance using Gazebo Rendering APIs.
This is not to be confused with integrating a new rendering engine. See How to write your own rendering engine plugin for that.
This tutorial will go over a couple of example plugins that are located at https://github.com/gazebosim/gz-sim/tree/main/examples/plugin/rendering_plugins.
Scenes
During simulation, there are up to two 3D scenes being rendered by Gazebo, one on the server process and one on the client process.
The server-side scene will only be created when using the gz::sim::systems::Sensors system plugin on the server. This is the scene that shows what the sensors see.
The client-side scene will only be created when using the gz::gui::plugins::MinimalScene GUI system plugin on the client. This is the scene that shows what the user sees.
For the user to see what the sensors see, they need to use other GUI plugins that display sensor data, such as gz::gui::plugins::ImageDisplay for camera images or gz::sim::VisualizeLidar for lidar point clouds.
Gazebo keeps these scenes in sync by sending periodic state messages from the server to the client that contain entity and component data with the gz::sim::systems::SceneBroadcaster plugin. Any changes done to these scenes using Gazebo Rendering APIs directly, as described in this tutorial, will only affect one of the scenes and will not be synchronized. The examples below will show how to change the ambient light for each scene separately.
Plugin types
Depending on the scene that you want to affect, you'll need to write a different plugin.
To interact with the server-side scene, you'll need to write an gz::sim::System. See Create System Plugins.
To interact with the client-side scene, you'll need to write an gz::gui::Plugin, or a more specialized gz::sim::GuiSystem if you need to access entities and components. See the GUI system plugin example.
Getting the scene
When writing either plugin type, the gz::rendering::Scene pointer can be conveniently found using the rendering engine's singleton. Both example plugins use the exact same logic to get the scene:
The function above works for most cases, but you're welcome to customize it for your use case.
Render thread
Rendering operations aren't thread-safe. To make sure there are no race conditions, all rendering operations should happen in the same thread, the "render thread". In order to access that thread from a custom plugin, it's necessary to listen to events that the 3D scene is emitting. These are different for each plugin type.
Render events on the GUI
The GUI plugin will need to listen to gz::gui::events::Render events. Here's how to do it:
Include the GUI events header:
#include <gz/gui/GuiEvents.hh>The 3D scene sends render events periodically to the
gz::gui::MainWindow, not directly to every plugin. Therefore, your plugin will need to install a filter so that it receives all events coming from theMainWindow. In your plugin'sLoadConfigcall, install the filter as follows:gz::gui::App()->findChild<gz::gui::MainWindow *>()->installEventFilter(this);The filter will direct all of
MainWindow's events to theeventFiltercallback. Add that function to your plugin as follows. Be sure to check for the event that you want, and end theeventFilterfunction by forwarding the event to the base class.bool RenderingGuiPlugin::eventFilter(QObject *_obj, QEvent *_event){if (_event->type() == gz::gui::events::Render::kType){// This event is called in the render thread, so it's safe to make// rendering calls herethis->PerformRenderingOperations();}// Standard event processingreturn QObject::eventFilter(_obj, _event);}All your rendering operations should happen right there where
PerformRenderingOperationsis located. In this example plugin, it checks if thedirtyflag is set, and if it is, it changes the scene's ambient light color randomly.void RenderingGuiPlugin::PerformRenderingOperations(){if (!this->dirty){return;}if (nullptr == this->scene){this->FindScene();}if (nullptr == this->scene)return;this->scene->SetAmbientLight({1.0});this->dirty = false;}
Render events on the server
The server plugin will need to listen gz::sim::events::PreRender, gz::sim::events::Render or gz::sim::events::PostRender events.
Here's how to do it:
Include the rendering events header:
#include <gz/sim/rendering/Events.hh>To receive
PreRenderevents, connect to it as follows, and thePerformRenderingOperationsfunction will be called periodically:this->connection = _eventMgr.Connect<gz::sim::events::PreRender>(std::bind(&RenderingServerPlugin::PerformRenderingOperations, this));All your rendering operations should happen at
PerformRenderingOperationsis located. In this example plugin, it checks if enough time has elapsed since the last color update, and updates the color if it's time:void RenderingServerPlugin::PerformRenderingOperations(){if (nullptr == this->scene){this->FindScene();}if (nullptr == this->scene)return;if (this->simTime - this->lastUpdate < 2s)return;this->scene->SetAmbientLight({1.0});this->lastUpdate = this->simTime;}
Running examples
Follow the build instructions on the rendering plugins README and you'll generate both plugins:
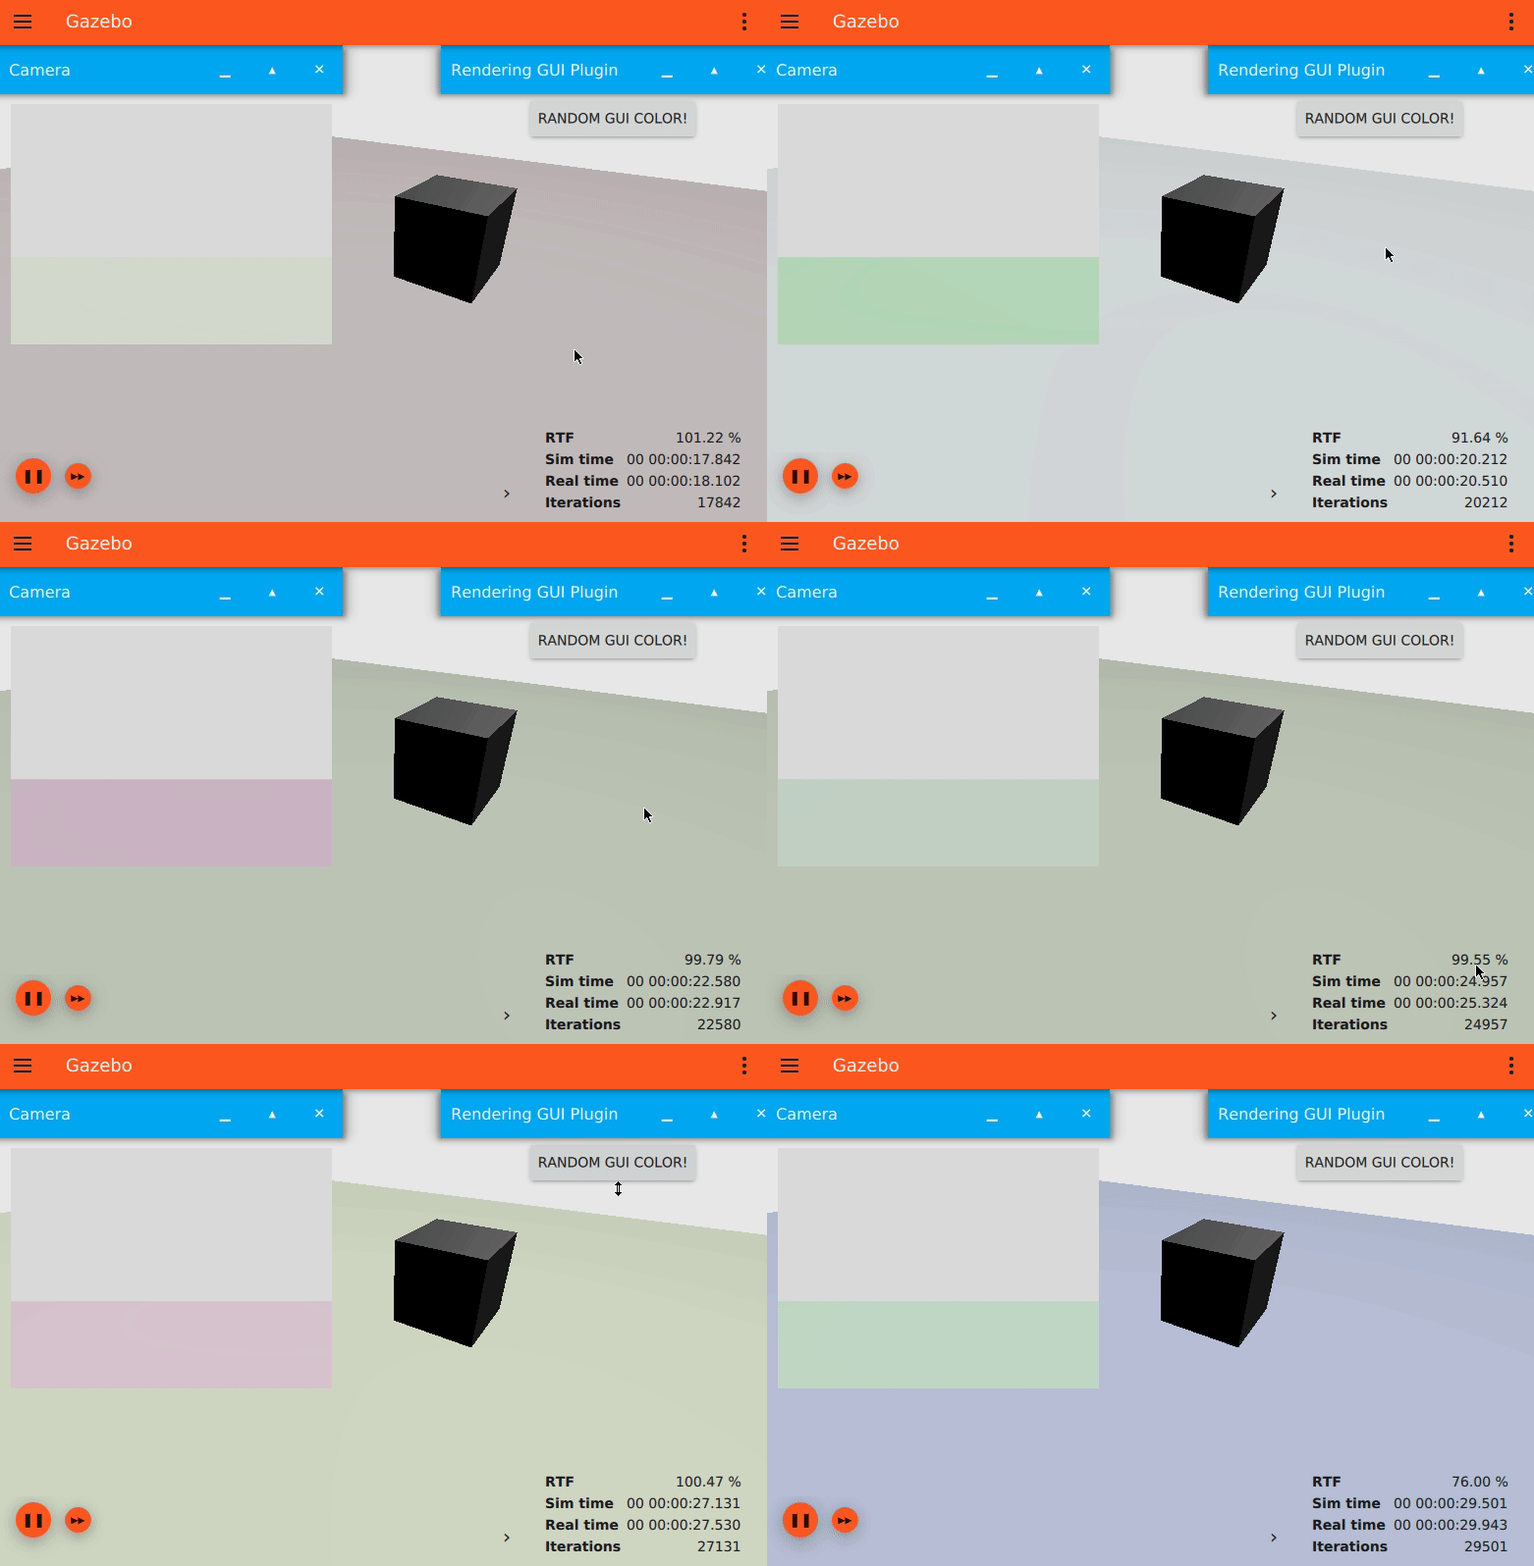
RenderingGuiPlugin: GUI plugin that updates the GUI scene's ambient light with a random color at each click.RenderingServerPlugin: Server plugin that updates the server scene's ambient light every 2 simulation seconds.
Run the example world that uses both plugins and observe how the scene seen by the camera sensor, displayed on the top-left camera image, is different from the one on the GUI. Try pausing simulation and pressing the RANDOM GUI COLOR button to see which scene gets updated.
